Teddy Bear tests in foam. I began cutting into foam to create a Teddy for the Child character, instead of making a Teddy from scratch using fabric or actual Teddy-making methods. During this test I decided that for the Teddy to be most effective for our film it should contain a simple armature, so that it can stay in place when the characters touch it.
The second Domovoi puppet came out of the mould with a few complications. We all forgot that because it was a wednesday, the oven would be switched off at midday. (Every wednesday there are maintenance checks on all workshops, and all these rooms and machinery are shut off)
This meant that Domovoi was left half baked in the oven for an hour before we realized that we had to go and switch the oven back on for extra time. Luckily, Keith, the technician, allowed us to get back into the workshop and switch the oven on for the appropriate additional time. A couple of hours later, Kane and I returned to the workshop to remove Domovoi from the oven. Once he was out of the mould, we realized that his back side and legs were still slightly damp and squashed inward, due to the oven being shut off half way through baking. The armature, head, chest, arms and hands, were still great, and had come out detailed and durable. I found the armature (made by Nicola) especially exciting, as it would enable us to move Domovoi's head into different positions, and the arms and hands were very sturdy and flexible. Even though there were faults to this puppet, there was still alot we could do with it. For example, only shoot this particular puppet from the front, chest up, or apply extra material to the damaged parts of the puppet to hide it.


Nicola then began cutting the excess foam from the edges of the Domovoi puppet.
We now had two (slightly faulty) Domovoi puppets. They looked great next to each other.
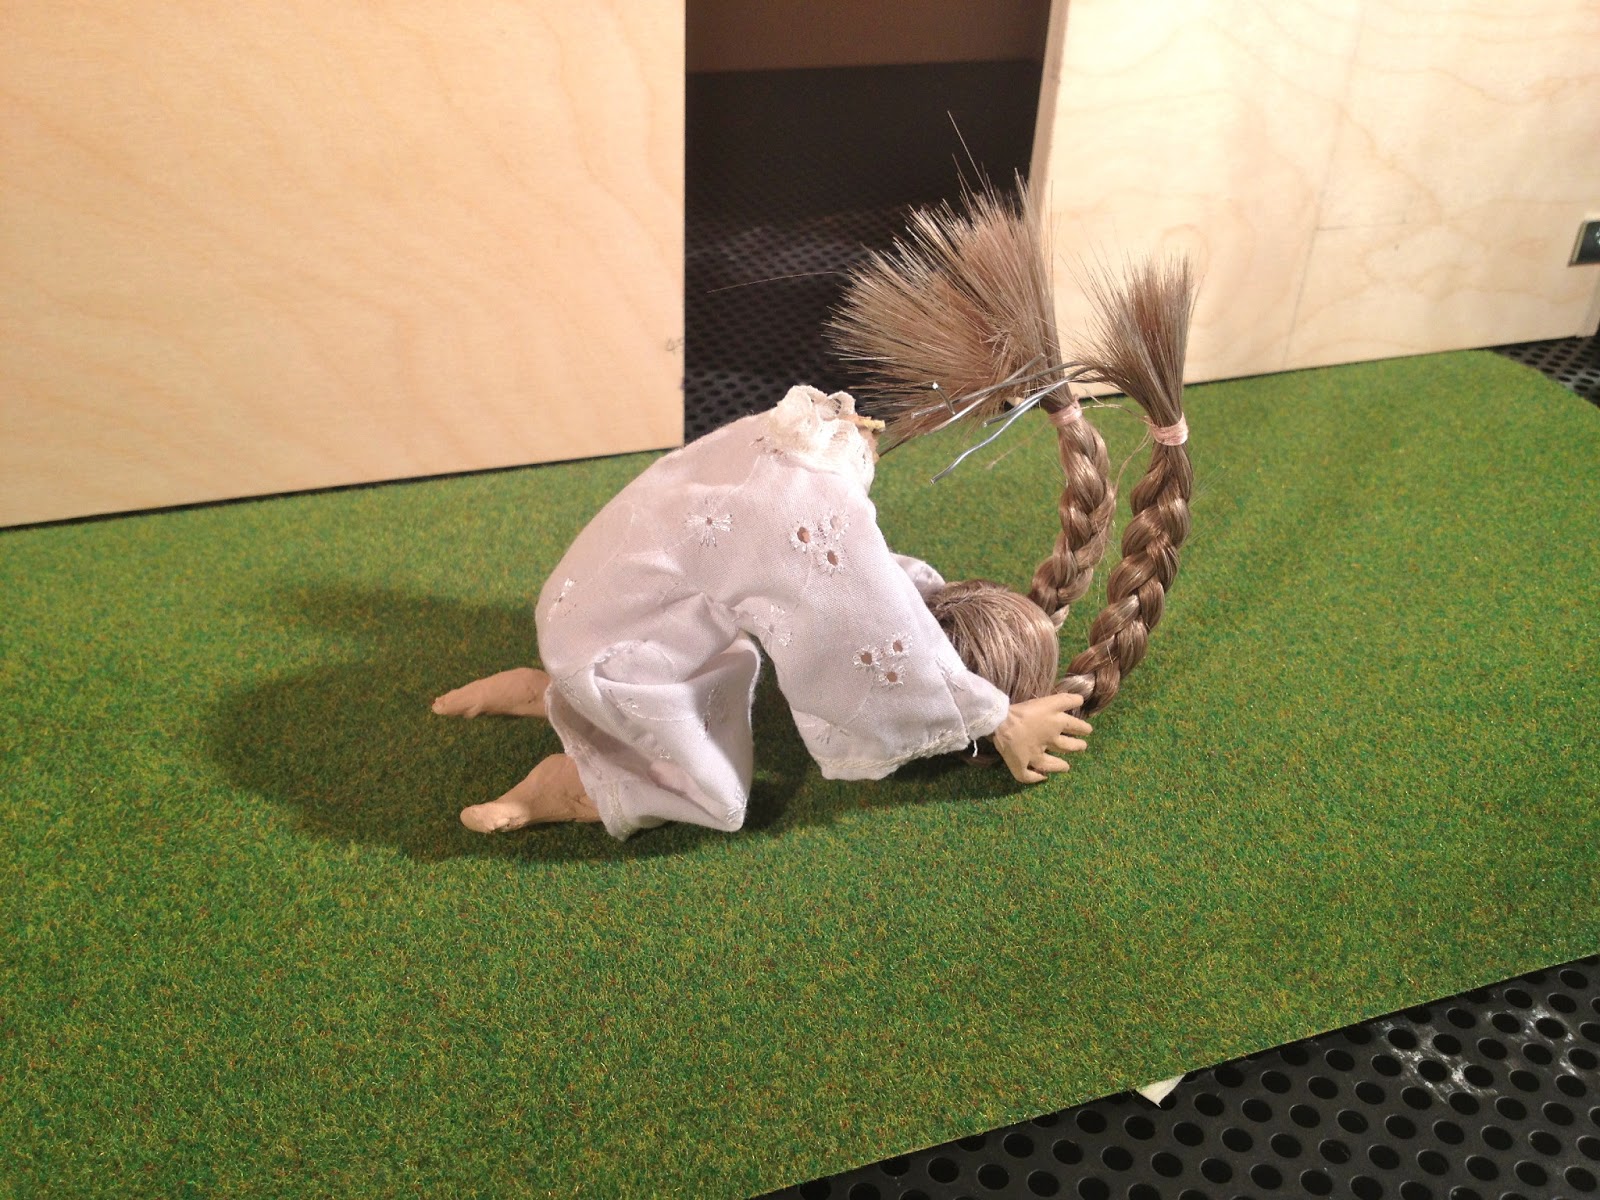
Nicola twisted wire through each strand of the Child's plaits, which would enable us to pose the hair according to whatever action happens in the film.
I made some animation tests using the Child Puppet (the first couple of tests were just playful experimentation). Our recent story development in rushes means that this character is less passive and will actually be actively moving about the room, crawling on the floor and showing emotion. I aim to test animate more crawl cycles in order to get this just right.
Final shot of third test animation of crawl. Getting into character.
Test painting of the top part of Kikimora's head. I have decided to go with cold colours for Kikimora, as with my original designs she needs to look as if she has a sunlight deficiency and a really translucent, porcelain complexion. I'll make these less blue on the next layer, as the blue hue could easily go green under warm lighting, and I don't think green will work with the general visual aesthetic of our film, which needs to be predominantly in earthy, fleshy tones.
The second armatures for the Child puppet and Kikimora were assembled by Nicola using twisted wire and miliput. These then went in the oven. Meanwhile, Nicola and I continued with other parts of the project.
I measured the door and windows to scale on the walls of our set, then transferred the measurements into an Illustrator File for the laser cutter. As you can see, I placed the Child puppet body on the door space so that I could see whether the scale was appropriate.
Once I measured out the windows and door and made the Illustrator file, I filled the outlines of the spaces that needed to be removed with lines, just to make it clear. Due to the laser cutter being completely broken by the time we had booked to use it, we decided to ask the technician, Warren, to help us cut these sections out by hand.
Warren kindly helped us cut the windows and door for our set. Once this was done, we took the boards of wood back to our studio, I sanded the edges to get rid of splinters. Nicola then used the powerdrill to screw small metal brackets onto the edges of each set wall.
The above photo was a test I did to see whether we can shoot scenes by literally pointing the camera lens through the central window in the set, rather than having to take it apart again to get the whole camera rig in this position. We will be test shooting more in future...
Ross, Rob and Nicola cut balsa wood into shape to indicate the planks that cover the walls of the main sets. I discussed whether we should do simply measured, precise line cuts, but I thought that a variation of gap and a more wobbly line to the planks would look more effective. Nicola showed me that they'd done a variation of overlapping and gapped plank sections, and this looked really effective and textural.
The Kikimora and Child moulds came out later that day. I prized them open and was very pleased to see how clear and detailed these puppets were.
The Kikimora puppet was great, the ribs were detailed and the spine had come out perfectly. The only problem to solve with this puppet in particular was that one of the arms was out of place with the position it was meant to be in. The armature can be seen to be just outside of the mould. We have now solved this by cutting into the mould and slipping the armature arm inside.
That evening I repainted the first Child body, and painted the new Child body.
Once we had a spot on the laser cutter we were able to cut out the furniture designs that I had put on Illustrator, but also to etch a small design onto the headboards of the Child's bed.
The etched design was especially great to see. It will add more character and texture to the set design of our film, and hopefully make it feel more real to the viewer.
We then made Kikimora's feet. I threaded small metal bolts to the base of the foot so that magnets will be able to attach to the feet during shooting.
Nicola then used the power drill to attach the base of the set to the walls.
I began fixing up the second Kikimora armature.


